 So you want to know how to distribute your native iPhone test app? It’s much easier than emailing updated versions to testers, if you can simply have the app online all the time. And having newer versions published when they become built is an added convenience.
First, it does not require an enterprise developer account with apple.
Second, it does require having an active web server somewhere, or at minimal a hosting account.
The basic process is quite easy, in fact.
I am using Xcode 4.3.1 at the time of this post.
Tis is all dependent on the the app using a provisioning profile which includes the device udid number for those individuals who are testing or previewing.
When a sample or project app is working, and you want to have it available, follow these steps:
- select the device target for the app to iOS device, not iOS simulator
- click Archive within the Product menu
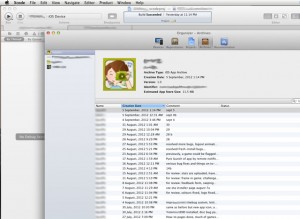
- … The Organizer window will appear, showing you the Archives content
- select the app on the left side, and then the specific archive file you’ve just created, on the right side
- now here’s the bit of a roller coaster… Press the Distribute button
- a drop-down view will appear with three options:
- Submit to the iOS App Store
- Save for Enterprise or Ad-Hoc Deployment
- Export as Xcode Archive
- select the save for enterprise or ad-hoc deployment option and then click next
- Choose the identity to sign with: ensure the appropriate code signing identity for this app is in the box
- …click next
- enter in the save info:
- ideally, you should out the date and/or build number into the file name beside “Save As:” including the extension “.ipa”
- figured out where you want the final results to be stored on your computer, and navigate to that folder, like you’ve probably done a thousand times before
- ensure the check box for “Save for Enterprise Distribution” is CHECKED
- add in the final text URL of the Internet address where you plan to upload the ipa file… I use a dedicated sub folder on the web site for these test apps.
- give the app a title for when the user attempts to download it
- the subtitle, large and small images are unnecessary but a nice thing to have, sometime
- click save, then use Finder to access the folder where you saved the ipa. You will see two files, with the same basic file names, with extension .ipa and the other is .plist.
- upload these two files, and later add a link to the plist file from a website.
- upload any updates to the website that may link to the plist file, etc.
- send out a message to all interested people that a new version of the app is online
(Forgive any typos herein, I typed this on the iPad WordPress app, and it leaves much to be desired… no spell checking for a start).
